Rendering pipeline
18 FEB // 2026
Creating a realistic render
Let's try to create a realistic render result by chaining a few tools together!
1. Sketchup
Start out by using Sketchup, or any similar modeling tool to create a low fidelity version of the scene you're trying to create.
![]()
Image: Sketchup logo
For this example lets go with a simple desk with a monitor on it.
The scene consists just out of a couple of boxes added together.
All the materials have a different color, and at this stage nothing has a real texture yet.

Image: Sketchup model with solid colors
At the end we save the scene as a .skp file.Twinmotion
For the rendering part we swith over to Twinmotion.
![]()
Image: Twinmotion logo
Import the scene in Twinmotion and start assigning materials to every surface. Some models are also imported to add some more details, such as a few plants and an office chair.
Image: Twinmotion viewport with different models added to add some fidelity
To export the image we render it using the path tracer at a 4k resolution.

Image: Twinmotion exported image at 4K resolution using the path tracer
ChatGPT
For the final, and optional step we're going to combine the output of the previous step with a simple ChatGPT prompt.
In this particular case the prompt was "Make this render look like a realistic picture".
The result can be seen below.

Image: The AI enhanced image
And that's it! By combining a couple of blocks stacked together, together with some included twinmotion models, we're able to generate a realistic looking scene!
A more detailed example
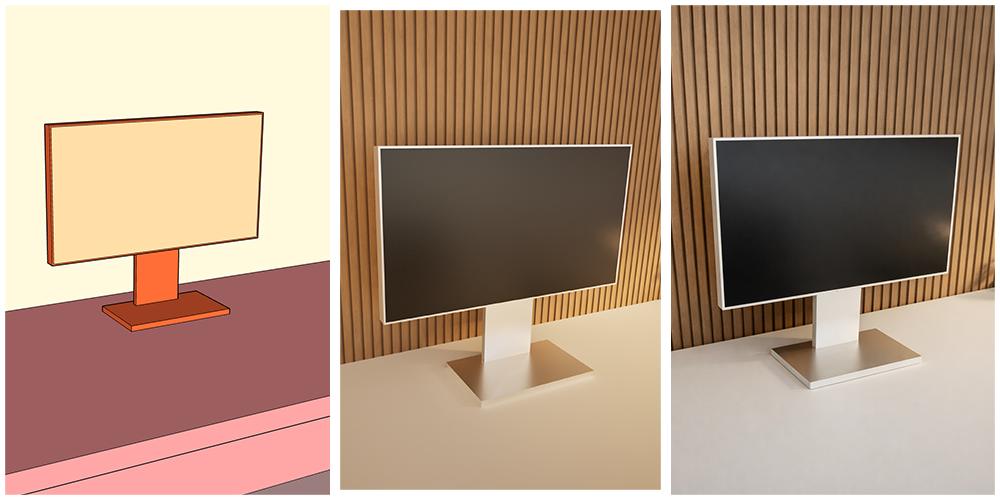
The 3-tier method demonstrated above was used to generate a more eleborate example, including more details.

Image: Step 1: Low fidelity

Image: Step 2: Details and textures

Image: Step 3: Using AI