Hosting a sveltekit app on azure app service

Abstract
In this post we will
- Create a Sveltekit demo project using create-svelte
- Install and use the svelte-azure adapter
- Upload the code to Azure Devops
- Create a Static Web App and link the repository
Creating a Sveltekit demo application
Let's get started by creating a new SvelteKit project.. If you already have an existing project you want to deploy, you can use that one instead of creating a new one. But for this article we will start with a brand new demo project.

Image: Svelte logo
We do this by making use of create-svelte, a CLI for creating new Sveltekit projects. Run the following command in the terminal.
The CLI interface that appears allows us to select one out of 3 possible starting projects. It doesn't really matter which one we choose, but the demo app showcases some nice features of Svelte, so we'll go with that one.

Image: Create a SvelteKit demo project using the command line
After selecting the demo project and finishing the setup, we navigate to the project directory, perform an install and start up the dev server.
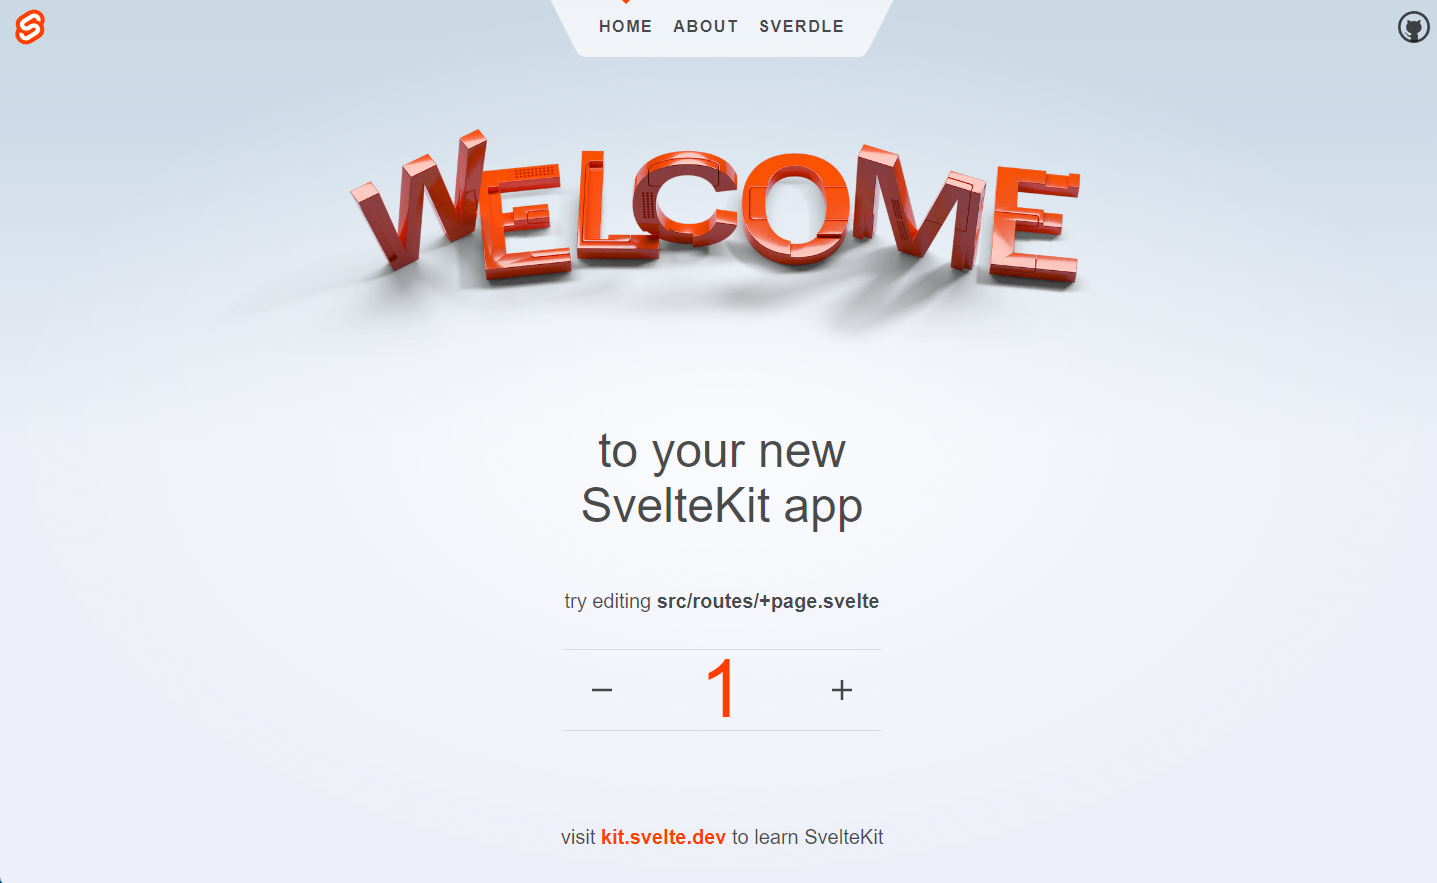
We are greeted with the following demo application. Our goal for today is to get this application hosted on the public internet.

Image: Sveltekit Demo App
Installing the Svelte - Azure adapter
To host our application on an Azure App Service instance, we will need to install a specific adapter. Svelte-adapter-azure-swa by Geoff Rich allows us to run our Sveltekit application on a Azure Static Web App. Install the adapter by running:
At the root of our project we need to update our svelte.config.js file to make use of the adapter. The first line of the file reads as follows:
We want to change this single line so we import the adapter from our newly installed package, like so:
Since both packages make use of the SvelteKit adapter API, we can easily swap them out.
Hosting the code on Azure Devops
Let's initialize a new git project in our folder by running the git init command in the terminal.
Next up, a new Azure Devops project is created by making use of the web interface.

Image: Azure Devops Project
Make sure to copy the url of the project, as we need it in the next step. For my case this was https://dev.azure.com/jefmeijvisdemo/_git/sveltekit-demo.
Let's add this remote to our local github repository, by running the git remote add command.
Any other git platform, such as GitHub for example, can be used for this.
Deploying the project on Azure App Service
Now that our Sveltekit demo project code is live on Azure Devops, we can move over to the Azure Portal. Make sure that you have a subscription set up and ready to go. If this is your first time using the Azure Portal, it might be possible to create a free trial subscription for 12 months of free services. Azure App Services is one of the services included in the free trial. More info for your region can be found at azure.microsoft.com/en-us/free.

Image: Select App Services between the available resources
Look for the Azure App Services logo between the available resources and select it. If this resource is not immediately visible, you might have to search for it in the search bar at the top of the portal. Select Azure App service and + Create Static Web App.

Image: Azure App Service logo © Microsoft
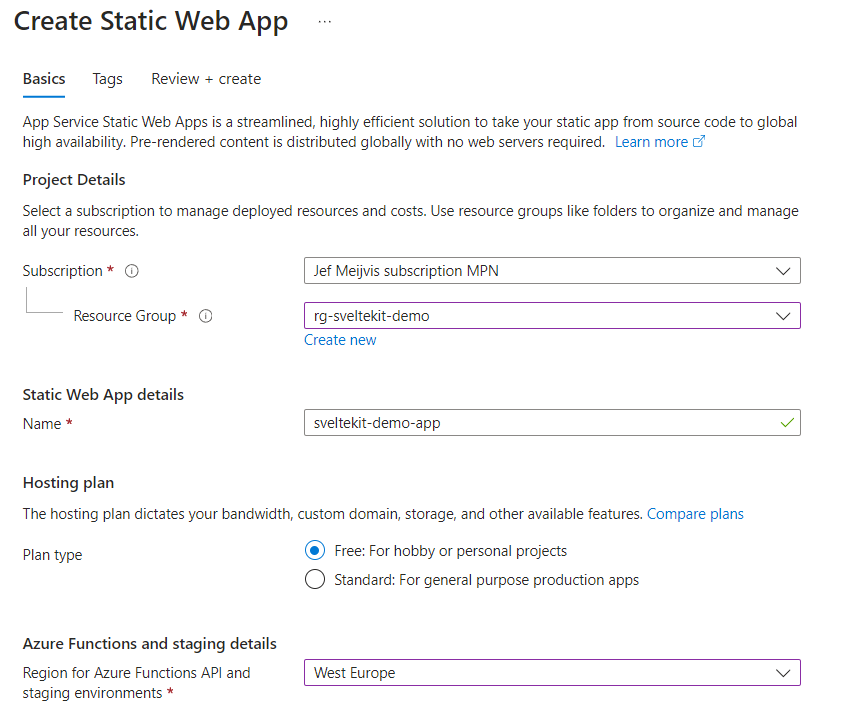
After selecting the Static Web App option, we are prompted with the project details. Select a subscription, create or provide a resource group and choose a project name. I've selected the Free hobby tier plan type because this is a demo project. As region I've selected West-Europe, as that is where I'm located. Below are the settings that I used:

Image: Entering the project details
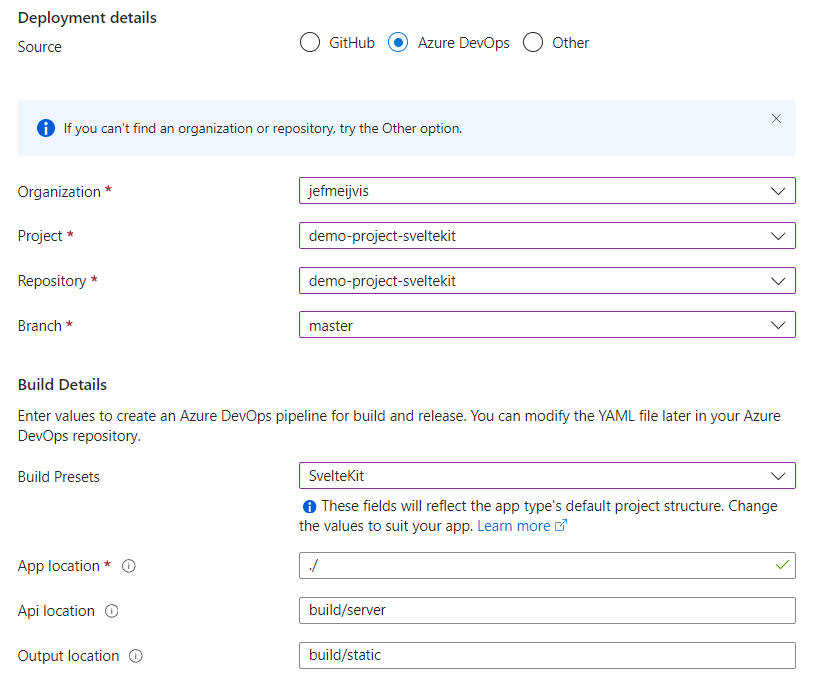
Next up we need to fill in our deployment details. I have selected my private demo Azure Devops organization, along with the details of the repository. By selecting the SvelteKit build preset, I'm provided with the default remaining settings, which work for most simple usecases.

Image: Entering the deployment details
Select Review and Create at the bottom of the screen, and if all is good and well we will have our Sveltekit app up and running. After a minute or so you will be able to open up the newly created resource, and go to the auto-generated URl. In my case this was https://lively-field-0af9dc903.4.azurestaticapps.net, but your URL will be different.
That's it! Our application is now live for everyone to visit. If we push any changes to the Azure Devops repository, a new build will start up and the changes will be shown on the website.
Further reading and relevant links
- https://kit.svelte.dev/docs/creating-a-project
- https://github.com/geoffrich/svelte-adapter-azure-swa
- https://www.reddit.com/r/sveltejs/comments/11zs3j1/help_to_deploy_sveltekit_app_in_azure/
- https://blog.hsnyc.co/devops/deploy-a-sveltekit-site-to-azure-static-web-apps/