Azure functions part 1 getting started

What are Azure Functions?
Azure Functions is a PaaS cloud offering from Microsoft, which allows you to deploy a piece of code, called a function, as a serverless component of your cloud infrastructure. Functions can be started by multiple triggers, reacting to changes and events inside of your cloud infrastructure.

Image: Azure Functions
Creating a function app
Let's head over to the Azure portal, and create an azure function app. A single function app provides the hosting and scaling of our function, and can hold multiple functions. We select Create a new resource > Function app > Create.
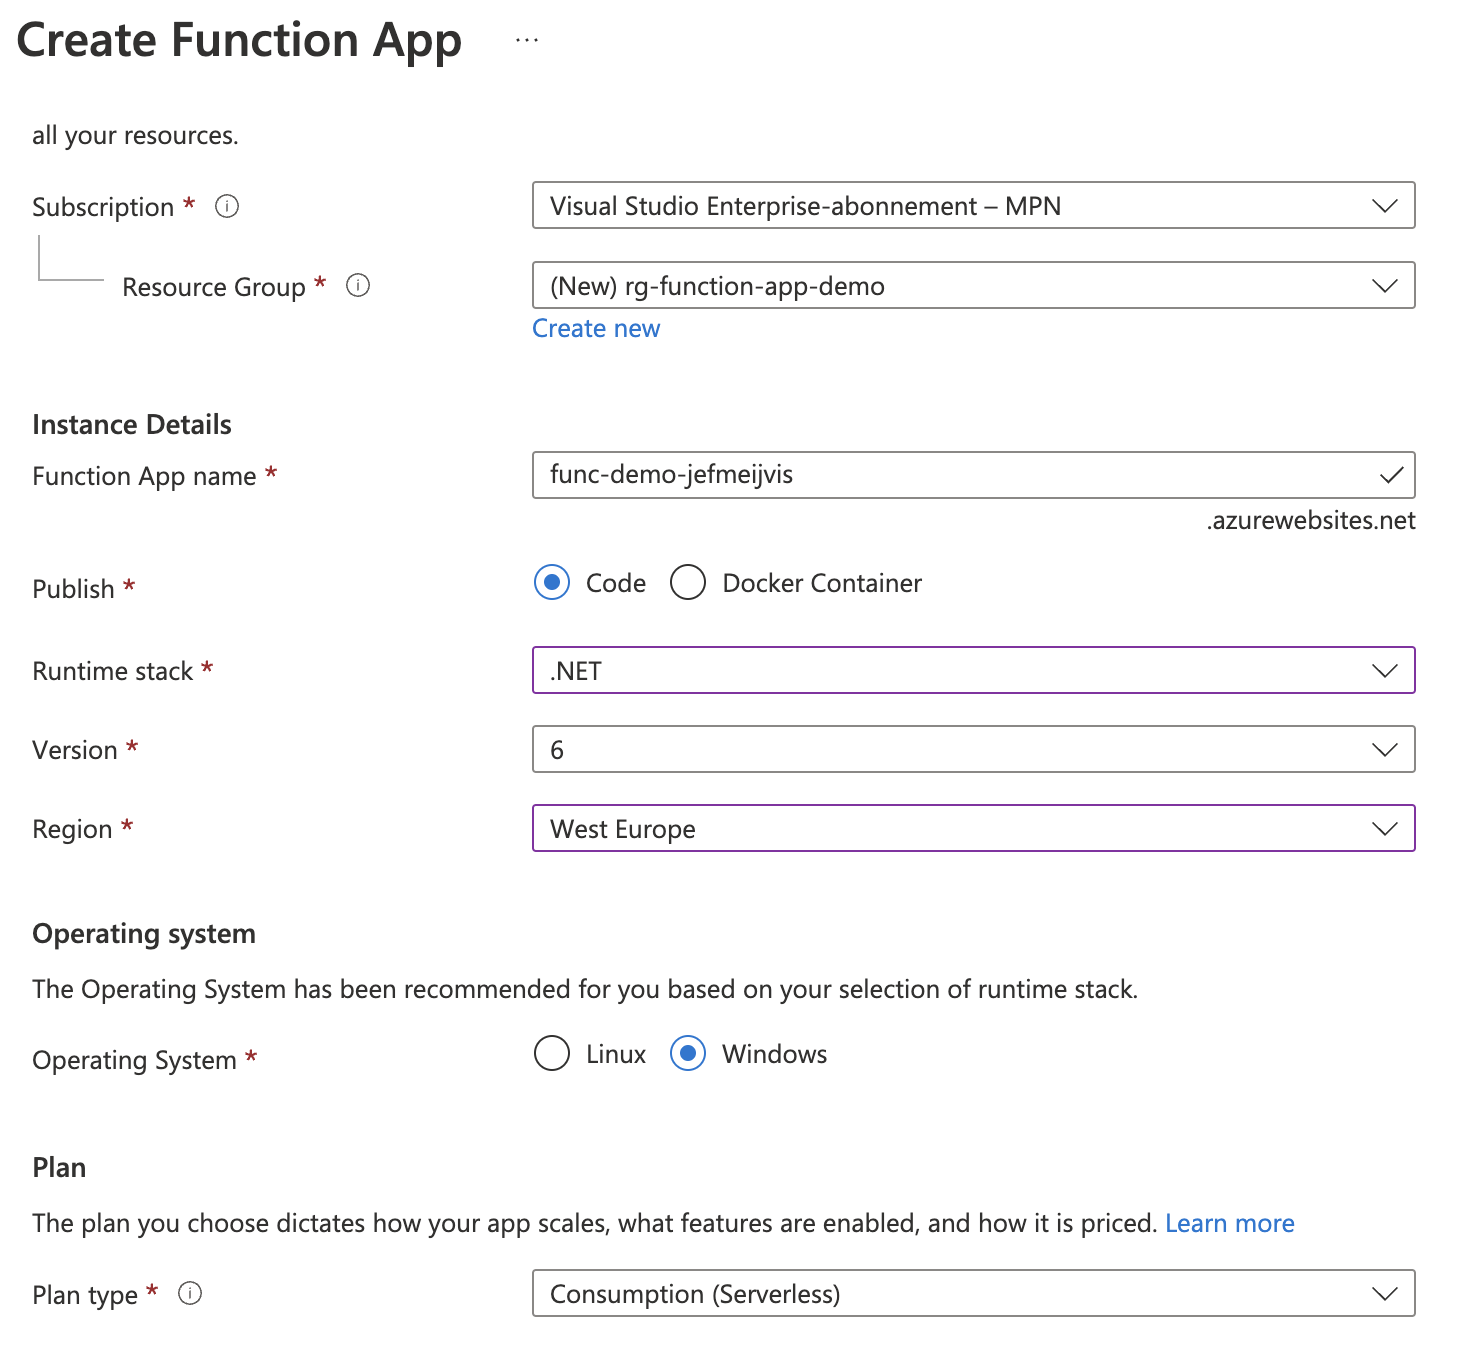
In the following form, we are able to provide details for how we wish to create our function app. Let's select the subscription we want to use, and create a new resource group for this demo. We choose a fitting name for both our resource group and function app instance.
Note
Microsoft specifies naming conventions regarding Azure resources. A resource group should always start with the "rg-" prefix. Likewise, we should add "func-" to the start of a function app name. The full list of naming conventions can be found at Resource Abbreviations.
For this demo, we will be deploying our code written in .NET 6, but any supported language can be picked here. As our plan, we will choose the consumption plan. This means we'll have to pay per execution, with the first one million executions for free each month. Full pricing details can be found at the Pricing overview.

Image: Azure Portal
We continue by clicking Review and create and Create. After a quick validation, deployment will start. Please note that this could take up to a couple of minutes to complete. Eventually you will be greeted by a confirmation screen, and with a link to inspect the resource.
Writing the code in .NET 6
Let's open up Visual Studio, 2019 or higher should do the trick. We create a new project, and select the Azure Functions template. Choose an appropiate name for your function. Under runtime version, select V3.
As trigger we will choose a Timer trigger for this demo. A trigger is what causes our function to run. Multiple triggers are available : Timers, HTTP calls and triggers that react on events inside your Azure environment. Think of a function that runs when a row is added to a database, or when a file is uploaded to a blob storage container. Please note that these options just populate the template, and can be switched around at any time during development. The following starting template will be generated:
For this demo, we won't be changing the template code around. The only 'functional' action our function will do, is create a logline.
Note
The Azure TimerTrigger is expressed as a NCrontab expression. [TimerTrigger("0 */5 * * * *")] means that our function runs every 5 minutes. This expression will be parsed to determine the exact timestamps your function will be triggered. Testers such as Swimburger NCrontab tester can be used to test and validate your expressions.
Deploying the function
Our function will be deployed from inside of Visual Studio. Please note that other options, such as the Azure CLI are also possible. Before we start, make sure you're logged in inside of Visual Studio with the acccount on which you access the Azure Portal. Right click the project > Publish > Publish to Azure. Select the Azure Function App we created at the start of this post. A build will be started, and the code will be deployed to the instance we created earlier.
We can verify the workings of this function by going to the Azure Portal and visiting our Function App. Under Logs we can interact with the query editor. Selecting traces will show us all traces generated by the function. Every 5 minutes we will see the logline from inside our code

Image: Logs
For part two, see Azure Functions : part 2
Further reading
- MS Docs, Introduction : https://docs.microsoft.com/en-us/azure/azure-functions/functions-overview
- MS Docs, Pricing : https://azure.microsoft.com/en-us/pricing/details/functions/